Studio Service Setup and Interface
Cluster Configuration
Studio, Studio Monitor, and the Composition feature are enabled by default. They will start with the other services when clicking on the Start All button from the Cluster UI page.
Once the Services Job starts, select .
Important
The audio stream is disabled by default. If you want to enable it, you need to do so before you start the Studio service.
You can enable the audio stream
in Genvid Settings. Navigate to Encode > Input and set Silent field to false.
Disabling Studio Service
If you want to disable the Studio service, you can do it either after jobs are already running or before starting them.
If jobs are already running, from the Cluster UI page:
Click the Stop All button.
Open the Genvid Settings page ().
Disable the Studio service, Composition functions, and Monitor.

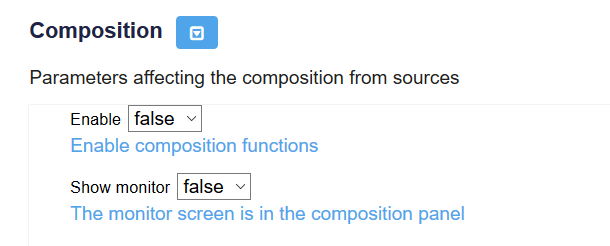
You can also load a HashiCorp configuration file that includes settings that disable the Studio service. For example:
version = "1.7.0"

settings {
   services {
      studio {
         enable = false
      }
   }
   encode {
      composition {
         enabled = false
         has_monitor = false
      }
   }
}
Once you’ve modified your configuration, use the Genvid Toolbox genvid-sdk command to load it to your cluster.
For a local cluster:
genvid-sdk load-config myhclfile.hcl
For a cloud cluster:
genvid-sdk -c $mycluster load-config myhclfile.hcl
After loading the configuration, restart the jobs from the Cluster UI by clicking the Start All button.
The Studio Website
Warning
This version of the Studio website only works on Google Chrome. It is only available as a preview and the interface will likely change in the future.
Starting a broadcast when streaming on YouTube or Twitch
Important
If your streaming service is configured to standalone, the ON AIR button
will not affect the broadcast.
If your streaming service is configured for other OVP, the broadcast will automatically start when:
Genvid Setting
broadcast/enableis set to true
If your streaming service is configured for other OVP, the broadcast won’t start when:
Genvid Setting
broadcast/enableis set to false, andThe ON AIR button is off.
To start a broadcast, click on the ON AIR button in the bottom left corner of Studio-UI. The broadcast will start some time later depending on the latency generated by the streaming service of your choice (e.g. YouTube or Twitch).

Monitor
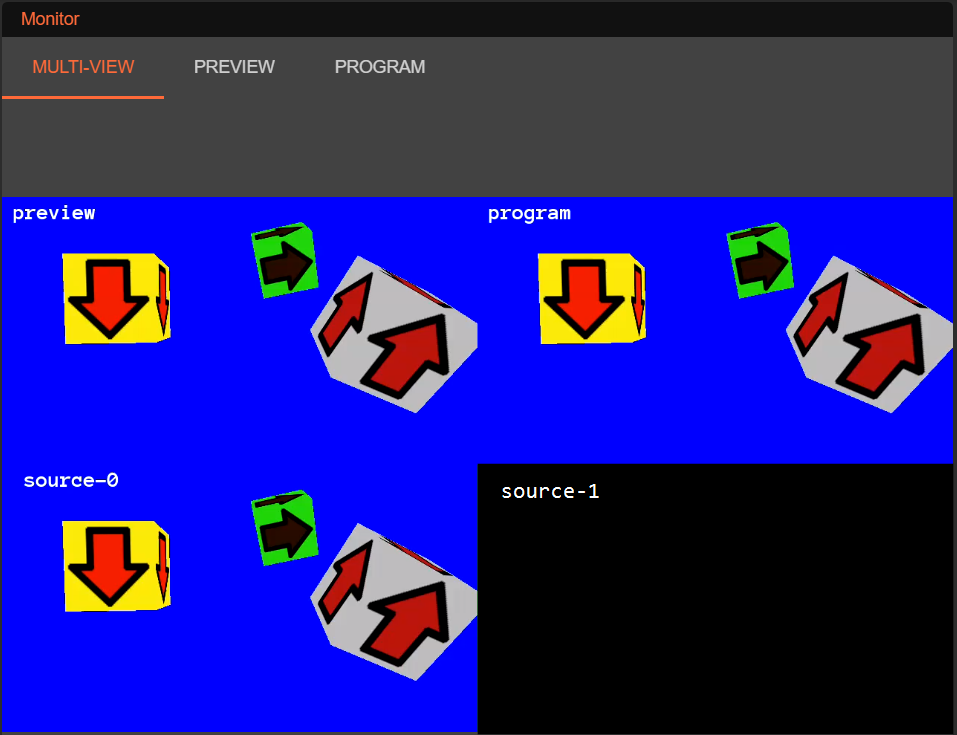
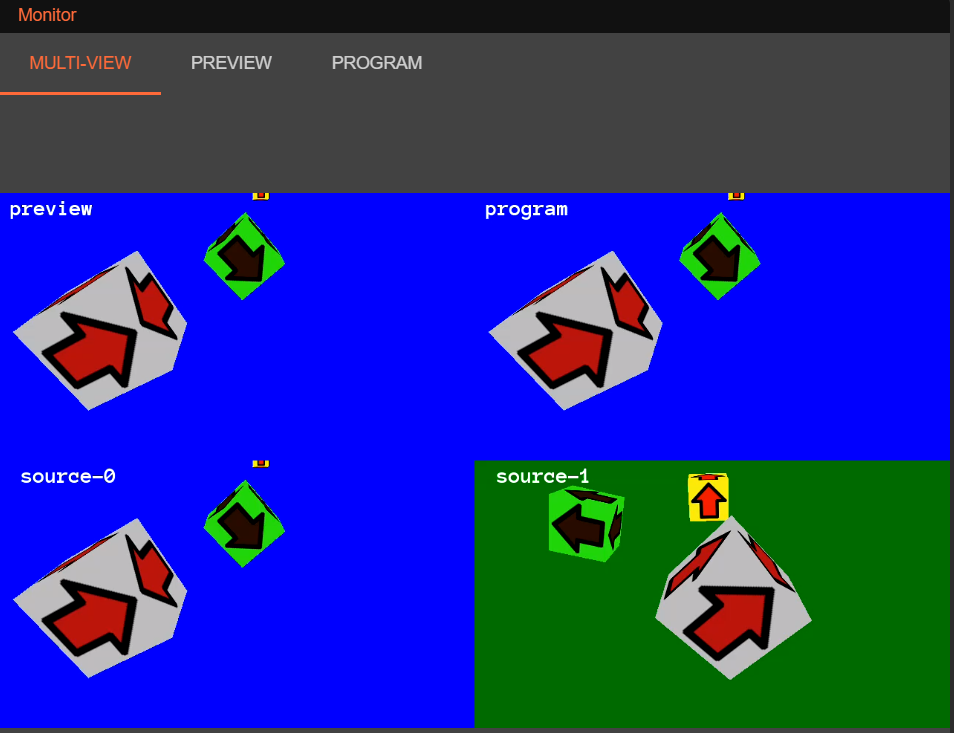
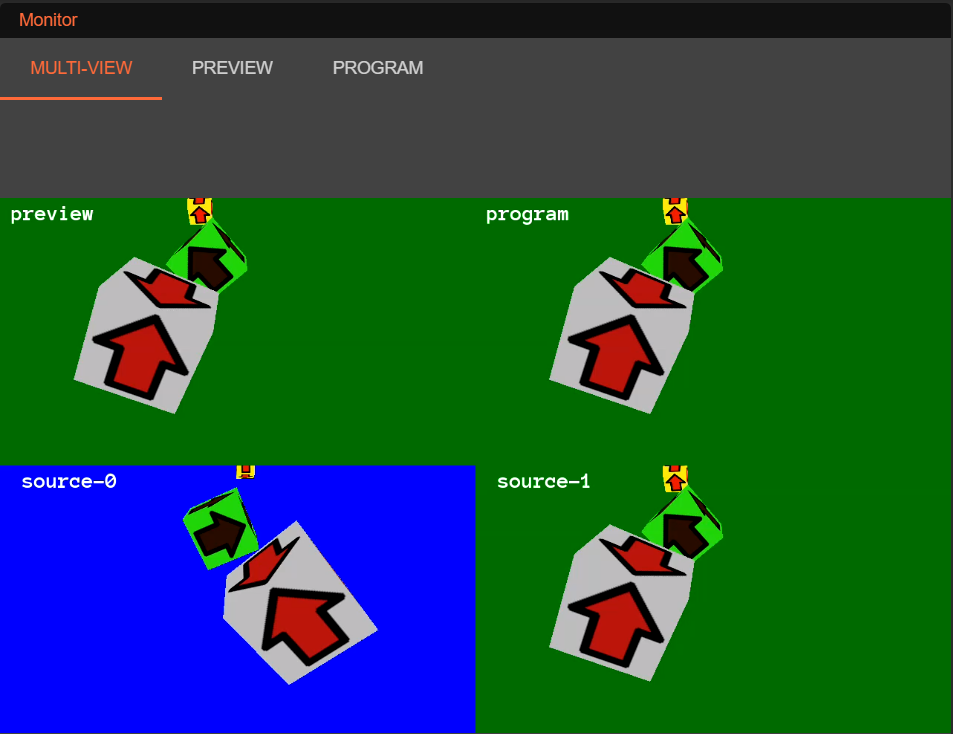
The top of the Composition page is the monitor screen. It displays four different areas:
The top left (preview) is the current Composition settings view.
The top right (program) is the current broadcast output.
The bottom left is the first input.
The bottom right is the second input.
We only started one DirectX instance, so there is only one input active.
Composition Editing
There are controls for modifying the composition. You can go to the individual page of a control, or use the dashboard to have all the controls at once.
Example - How to Switch Video Source
Click the green arrow next to “directx” on the Cluster-UI jobs page to start a second DirectX instance.

We now have two active inputs.
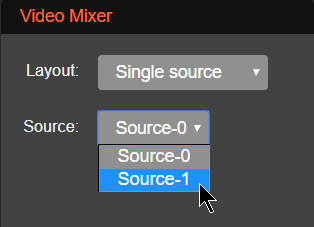
Select Source 1 as the active input in the Source of the Video Mixer.
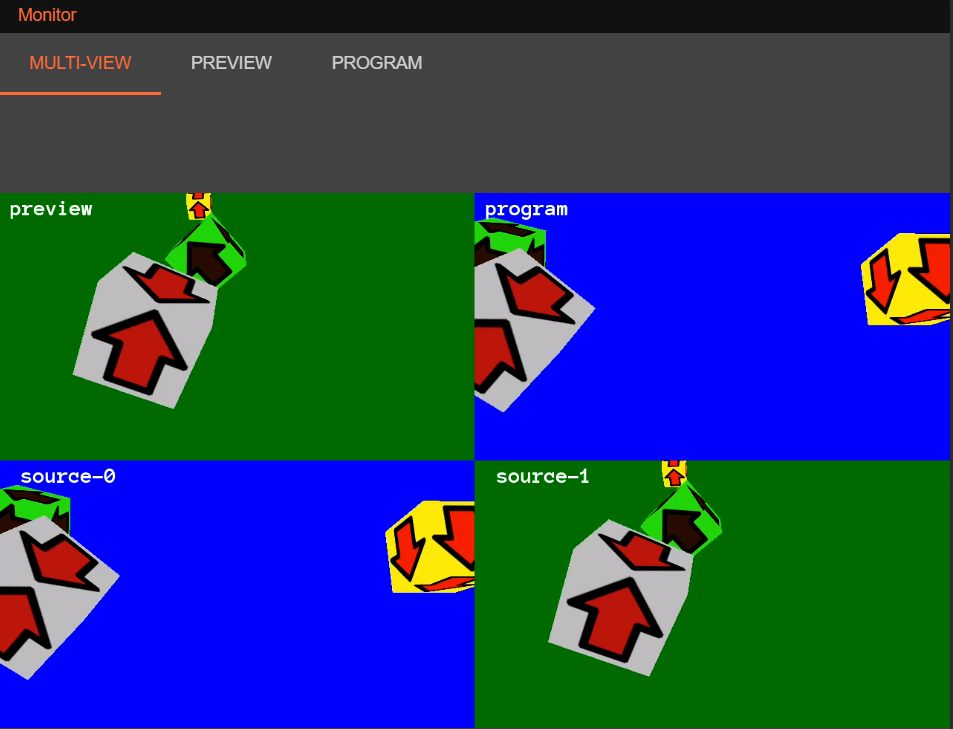
Source 1 shows in the preview area, while Source 0 still broadcasts.
Click Cut in the bottom right corner of Studio-UI to switch the streaming to Source 1.

Source 1 is now broadcasting.
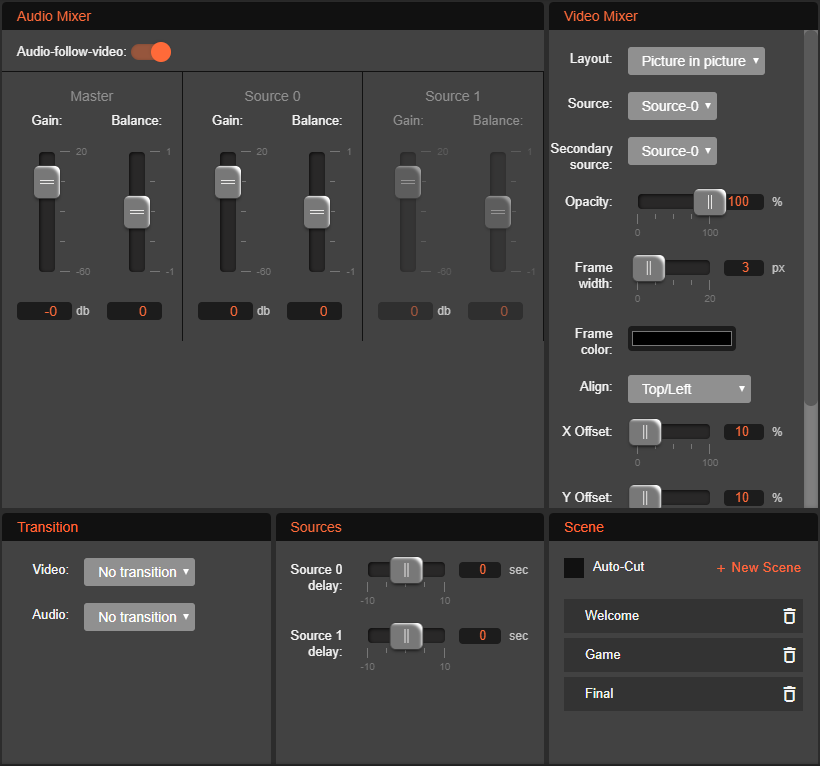
Example - How to Activate PIP
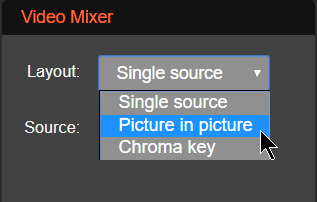
Select Picture-in-Picture in the Layout dropdown list of the Video Mixer.
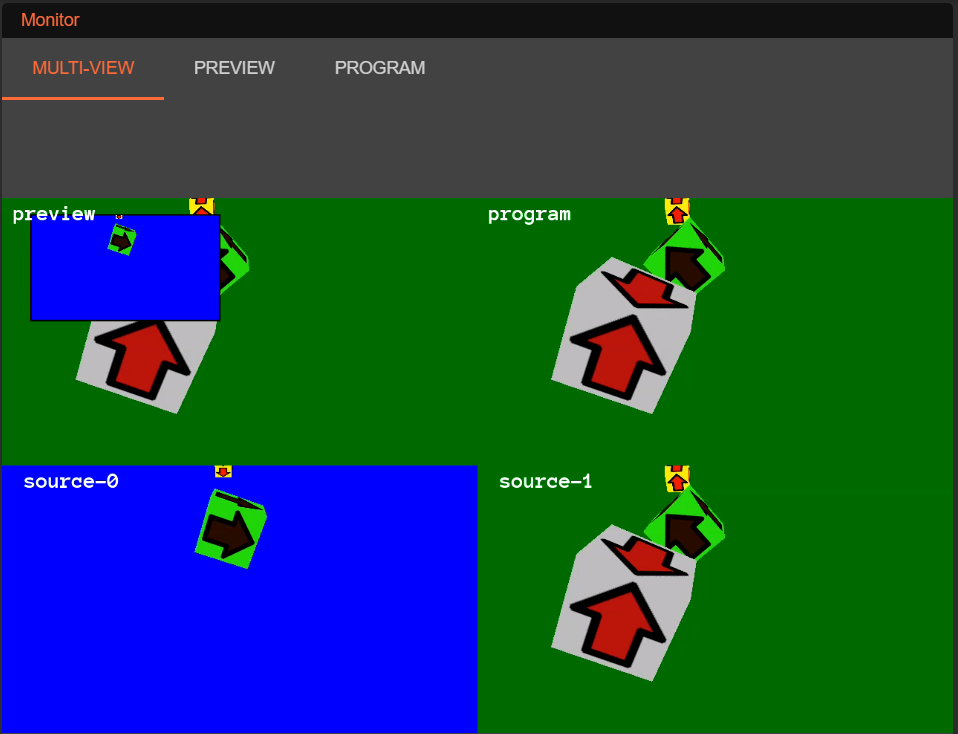
Source 0 now shows in the PIP window, while Source 1 is the background image.
Click Cut in the Transition section of Compose to switch the streaming to
the PIP composition.

The PIP composition is now broadcasting.
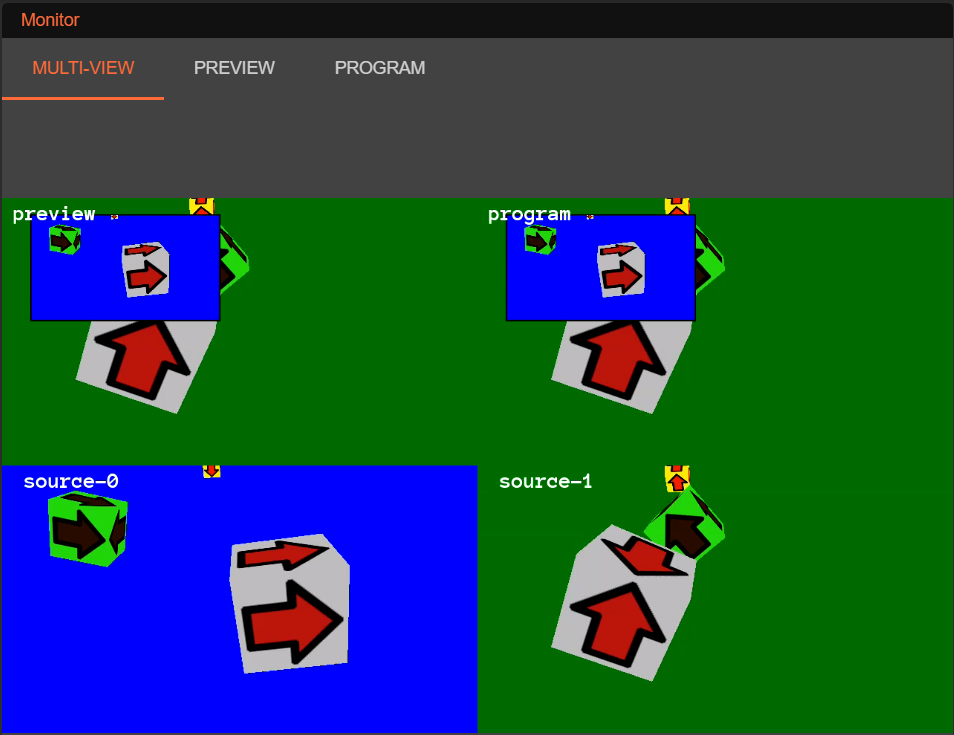
You can now experiment with the other settings.
Warning
When using the Chroma Key Filter, we recommend using a c5.4xlarge or better for the encoding machine. Less powerful instances may force the system to accumulate some frames in memory, leading to out-of-memory conditions.
The number of accumulated frames depends on many factors like encoding
parameters, source and destination FPS, complexity of the source images
content, etc. For more information on monitoring the memory usage of
GVEncode, see the Hashicorp documentation.
Dashboards
A dashboard is a customized layout of all control panels. You can create dashboards and modify them.
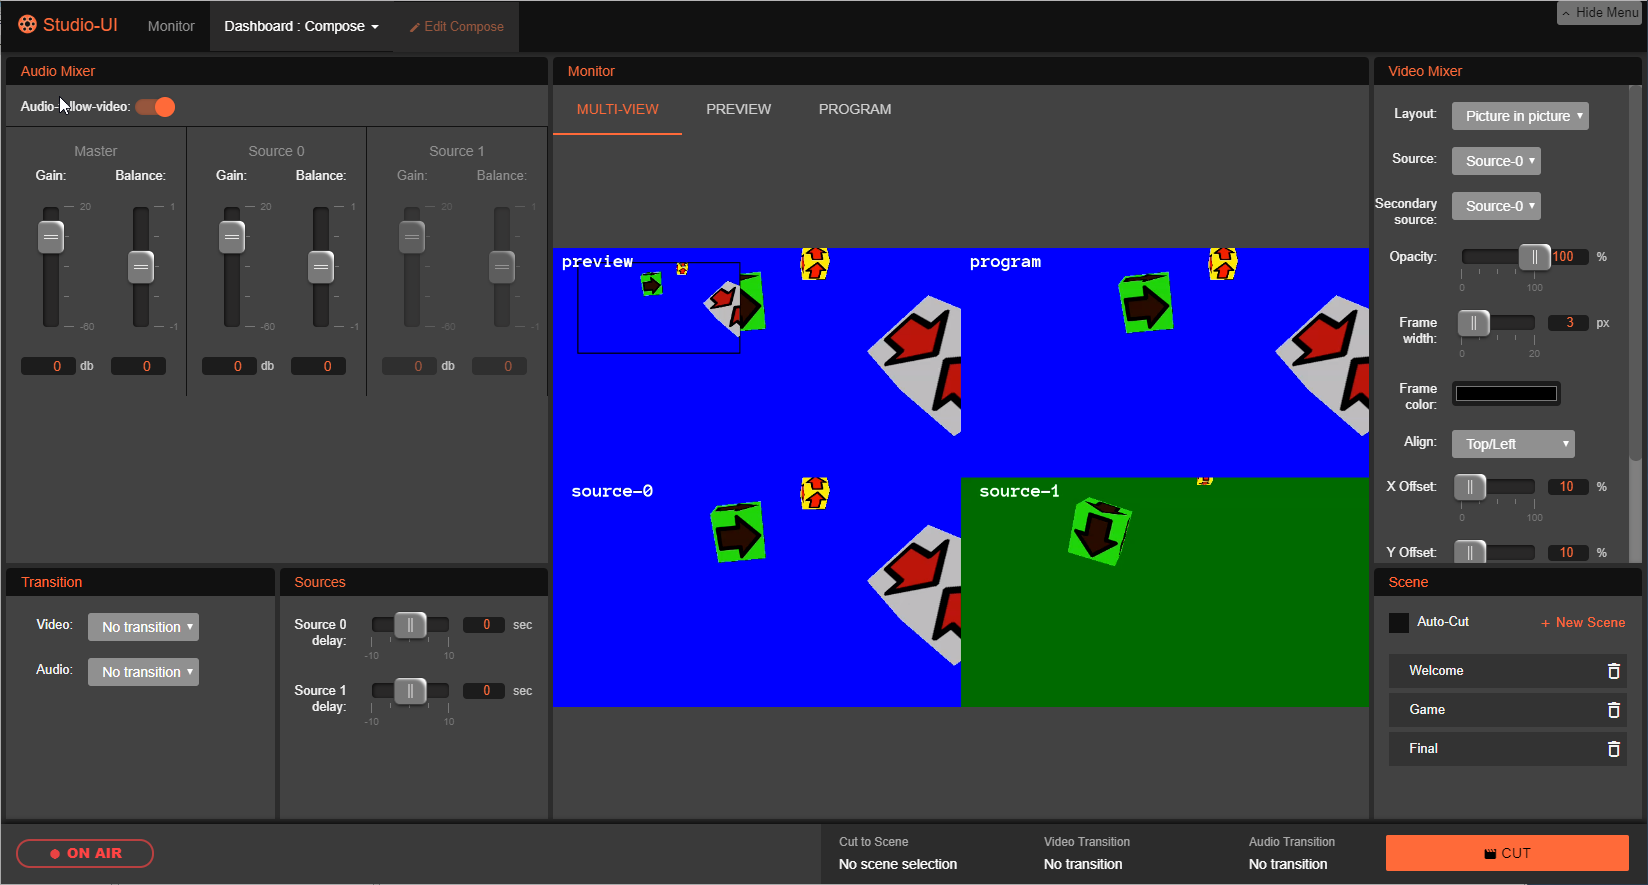
Create a Dashboard
To create a dashboard, go to the Dashboards menu and click New Dashboard. You will go to a page where you can create a dashboard. Enter an ID and click Create.

Edit a Dashboard
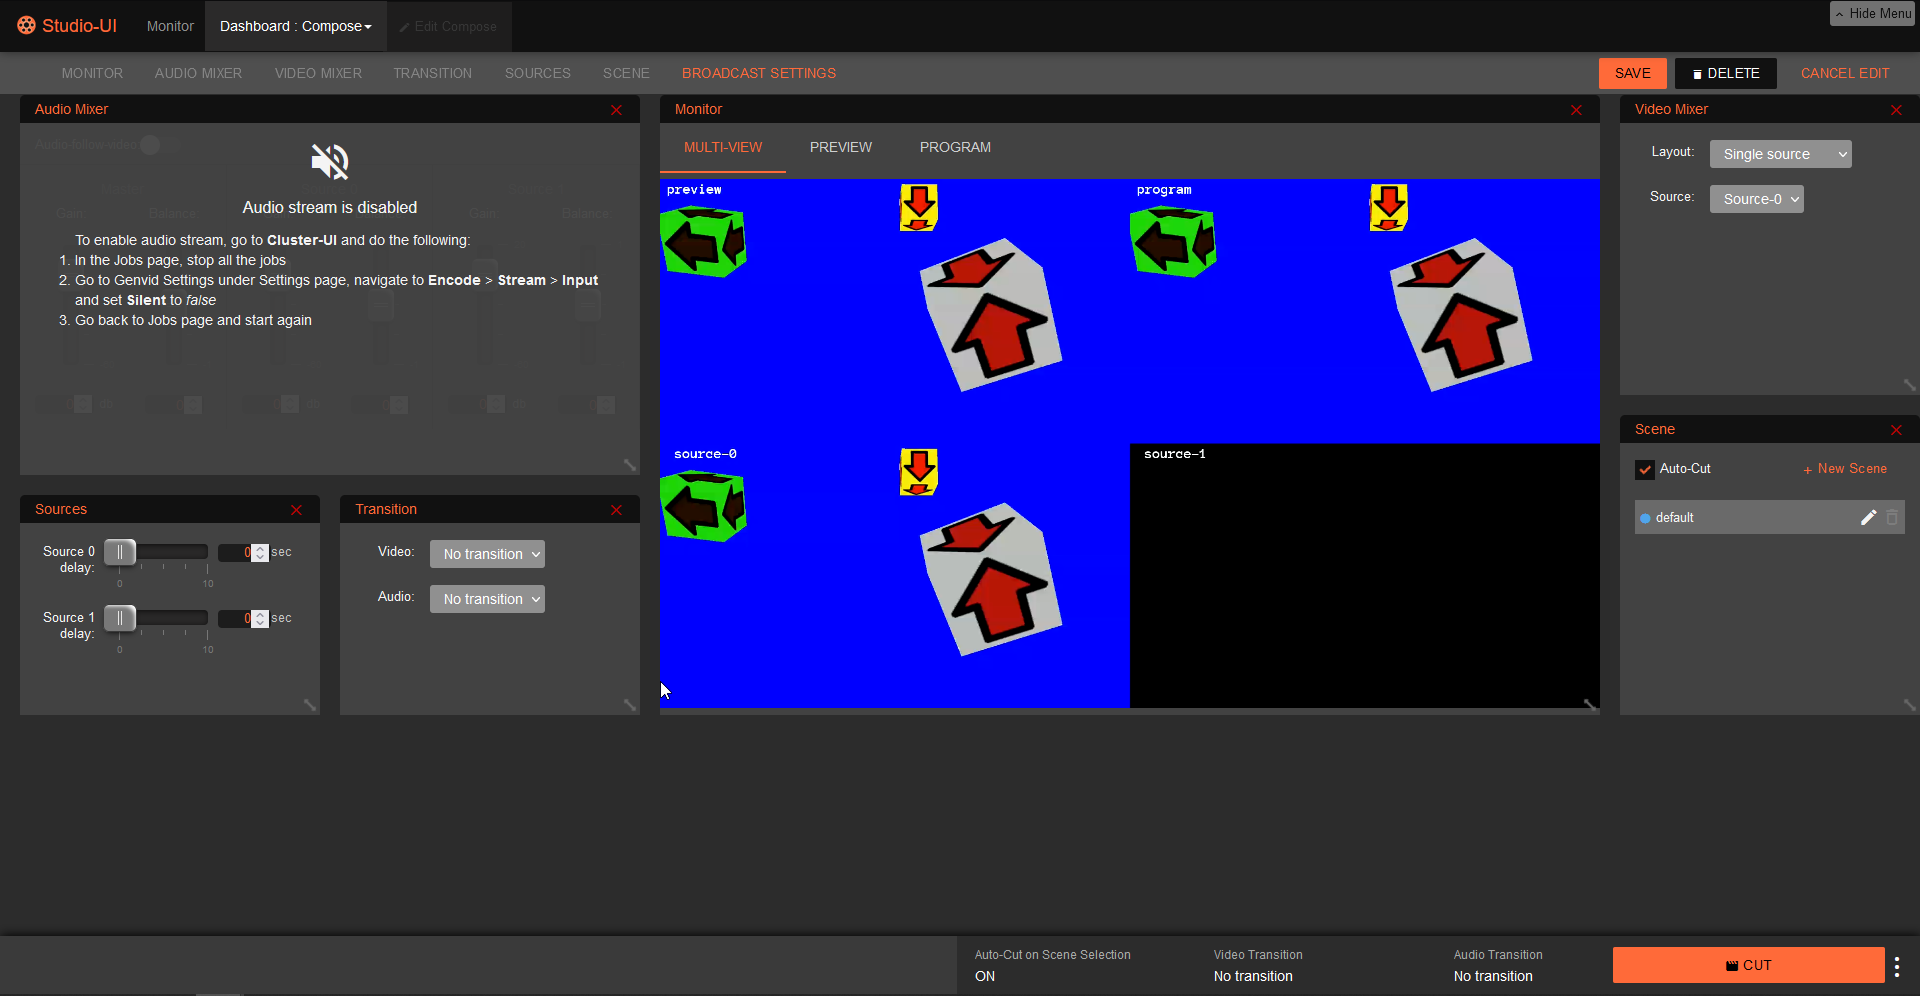
To edit a dashboard, click the Edit button on the navigation bar when the dashboard is active. You can add, remove, move or resize the control panels.
Click the control panel name that you wish to activate.
To remove a control panel, click the red X in the upper right window of the control panel.
Menu items corresponding to control panels already on the dashboard are disabled.
To save the layout modification to the dashboard, click the Save button.
To remove a dashboard, click the Delete button.
Source Settings
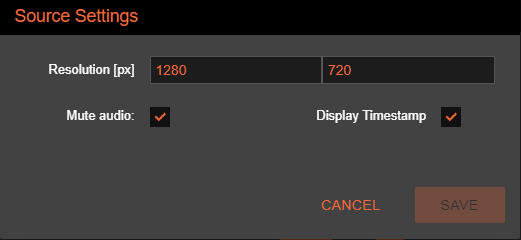
Use the Source Settings component to select the format in which you want to receive the RTMSP feed. To edit the Source Settings, click the pen icon located in the top right corner of the Source component.
Resolution
Determine the width and height of the RTMSP source.
Mute Audio
Check this box to silence the source audio. Use this when developing in a local environment so you don’t get a feedback loop.
Display Timestamp
Check this box to burn the source timestamp on the source image. The source timestamp will appear on the bottom right corner. Use this to validate synchronization.
Monitor Settings
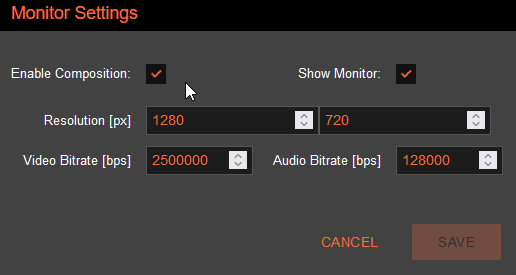
Use the Monitor Settings component to select the format in which you want to see a preview of your broadcast. To edit the Monitor Settings, click the pen icon located in the top right corner of the Monitor component.
Enable Composition
Uncheck this box to restrict the input source to a single stream.
Show Monitor
Check this box to display video on the preview monitor. Usually, this should be enabled.
Resolution
Determine the width and height of the image of the preview monitor.
Audio and Video Bitrate
Set the video and audio bitrate of the preview monitor, in bits per second.
Broadcast Settings
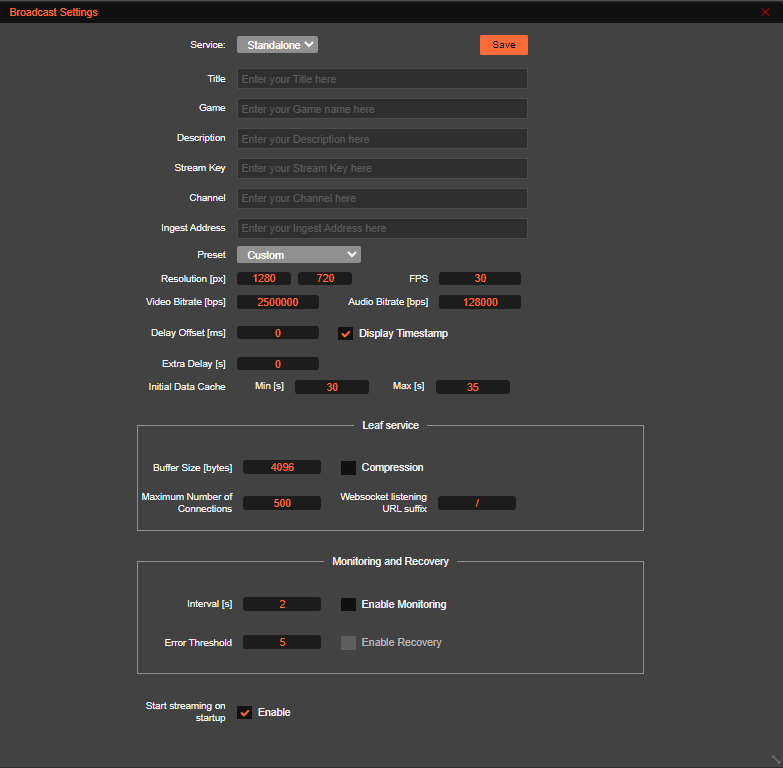
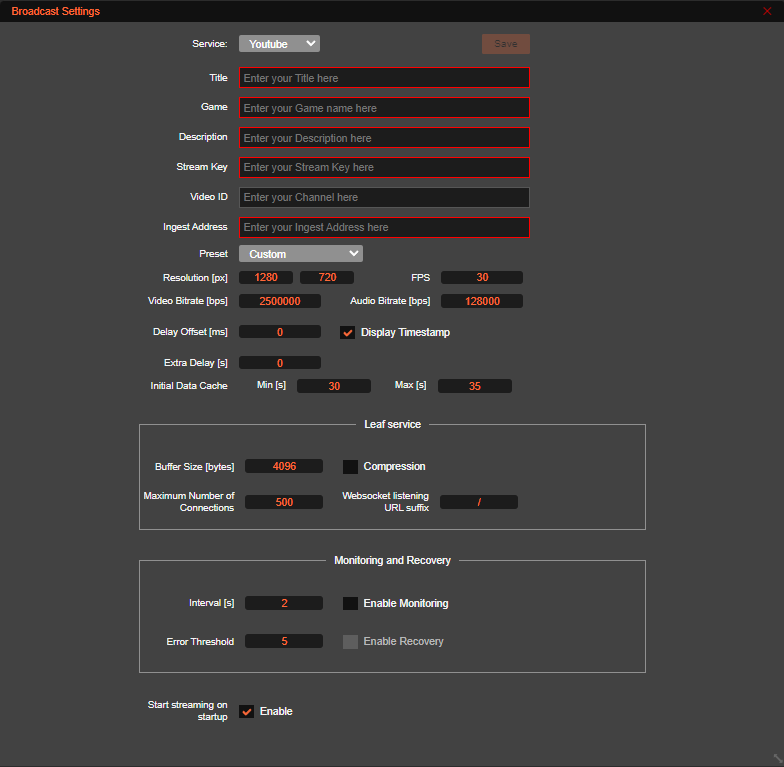
Use the Broadcast Settings component to configure the desired output for your broadcast session.
The following fields are available. Note that in Standalone mode, some fields are unnecessary and are disabled. Once you are done, restart the services to apply your changes.
Service
Choose your Online Video Platform (OVP). To develop and test in your local environment, select Standalone.
Title
Give a relevant name to your MILE. This name will be displayed on the OVP.
Description
Add a meaningful description that will be compelling to your audience. This description will be displayed on the OVP.
Token
This feature is not yet available.
Stream Key
Channel (For Twitch)
Enter your Twitch Channel name. For more information, see the Twitch Setup instructions.
Video ID (For YouTube)
Enter your YouTube video ID. For more information, see the YouTube Setup instructions.
Ingest Address
Enter the address of the streaming server. It typically starts with “rtmp(s)://”.
Preset
Choose one of the following settings:
1080p/30 fps
720p/30 fps
1080p/60 fps
720p/60 fps
Custom
Settings for the recommended output of each platform are automatically configured. Depending on your selection, the video and audio bitrate will also be adjusted.
For more information about recommended settings, see:
Resolution
Resolutions of 720p and 1080p are supported.
FPS
Frame rates of 30 fps and 60 fps are supported.
Video and Audio Bitrate
The video and audio bitrate are automatically set to the broadcasting guidelines of the OVP you chose.
Delay Offset
Enter the number of seconds of delay you want to add to the game data, relative to the video timecode. Use this to synchronize streams when you know the OVP has a systematic delay over your video stream.
Display Timestamp
Check this box to burn the output timestamp on the image. The output timestamp will appear on the upper left corner. Use this to validate synchronization.
Initial Data Cache
Set the number of seconds of the data stream to store in the memory cache.
The initial data cache covers for any latency, so make sure your minimum is set to at least the value of your OVP’s latency. The Web SDK uses this buffer upon connection to ensure data is available instantly to the participant.
See your OVP’s documentation for more information on how to find its latency value.
Note
If your minimum cache-value (Min) is lower than the latency, the participant might experience a delay in which the data isn’t displayed immediately when they connect to the stream.
Determine how frequently you want to bring the cache back to its minimum value by setting the maximum cache-value (Max). For example, if you choose a minimum of 15 seconds and a maximum of 25 seconds, every time the cache accumulates 25 seconds of data it will drop the oldest 10 seconds to get back to its initial size of 15 seconds. It will then accrue data again until it reaches 25 seconds, and repeat this process over and over.
That being said, you might worry about keeping too much data in your cache, which would increase memory usage needlessly. But with your maximum set to 25 seconds, a full day of streaming will never cause a usage overhead of more than 25 seconds. Overhead numbers like this generally won’t significantly increase your costs.
Important
Check with your hosting provider to verify what constitutes an overage for your product.
By default, the Genvid Settings match the latency values of your chosen OVP. For example, we use the ultralow latency values for YouTube. You can adjust these values directly if you require a different setting for your OVP.
Scenes
A scene is the arrangement of a composition set for a specific purpose. You can create different scenes that have different compositions and switch between them.
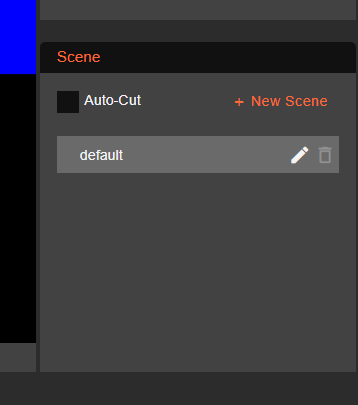
Default scene
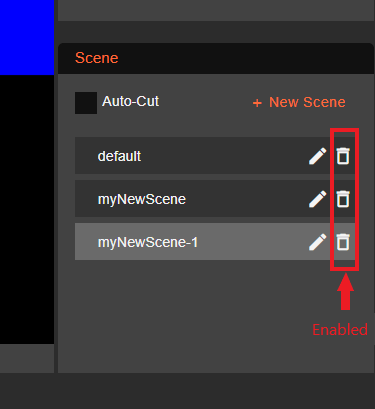
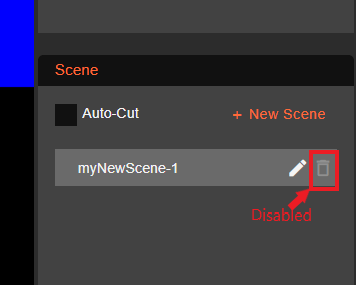
Studio automatically creates a scene with the default configuration when you open a new dashboard. You can click the Edit button to modify the name or composition arrangement. The Delete button is disabled whenever there is only one scene in the list.
Create a Scene
To create a new scene with the current composition arrangement:
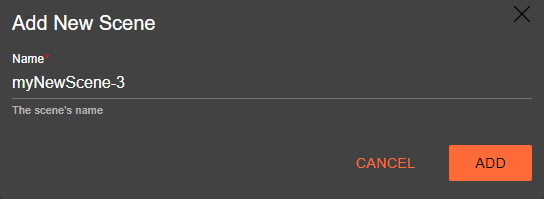
Click + New Scene on the Scene panel. This opens the Add New Scene dialog box.
Enter a name for the scene.
Click ADD.
View/Edit a Scene
To view or edit one of your scenes:
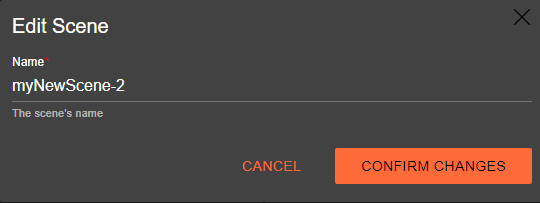
Click on the crayon icon on the scene you want to edit. This opens the Edit Scene dialog box.
If you wish so, you can modify the name of the scene. If a name is already taken, the CONFIRM CHANGES button will turn gray and you won’t be able to save it.
Click CONFIRM CHANGES.

Duplicate a Scene
To configure a new scene that’s based on an existing scene:
Select the existing scene you want to duplicate.
Click + New Scene on the Scene panel.
Enter a different name for the scene.
Click ADD.
This will duplicate the composition arrangement from the existing scene and you can then modify from there.
Modify a Scene
To modify an existing scene:
Select the scene you want to change.
Change the control values as needed.
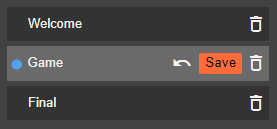
Changing the scene composition causes the Reset and Save buttons to appear. Click Save to save the changes or Reset to undo them.
Note
If the scene you’re modifying is the current broadcast stream (with a blue dot by its name), the changes won’t automatically be applied to the broadcast unless Auto-Cut is enabled. If it isn’t, click CUT to apply changes to the stream.
Delete a scene
You can click the Delete button next to any scene to delete it. However, you must have at least one scene, so we disable the Delete button for the last remaining scene.
Switch Between Scenes
To switch to another scene:
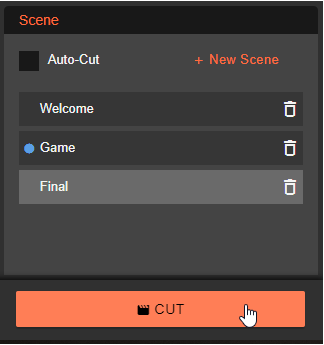
Select the scene you want to broadcast.
Click CUT.
A blue dot appears next to the name of the scene, indicating that the current broadcast stream is using that scene.
Auto-Cut on Scene Selection
The Auto-Cut feature lets you switch immediately to a new scene when you enable it, without having to click CUT.
To change the broadcast stream automatically when you choose a different scene, select the Auto-Cut checkbox. If you make changes to the current scene, they are saved and broadcast as soon as you save the scene.
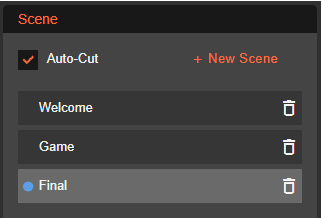
The Auto-Cut checkbox is cleared by default.
Note
The state of the Auto-Cut checkbox is stored on the client side. If you stop and restart Studio or clear the browser cache, it will reset to the default cleared state.
Live Composition
Live Composition mode is like setting Auto-Cut globally. Any changes made on the scene, audio-mixer and video-mixer components will be automatically sent to the stream without a CUT.
Enabling Live Composition affects the studio dashboard in two ways:
It enables the Auto-Cut feature and disables the check box. You can’t turn it off directly.
The Status panel shows Live Composition Mode: Enabled and adds a Disable button.

Enable Live Composition
To enable Live Composition mode:
Click the three-dot button beside the CUT button.

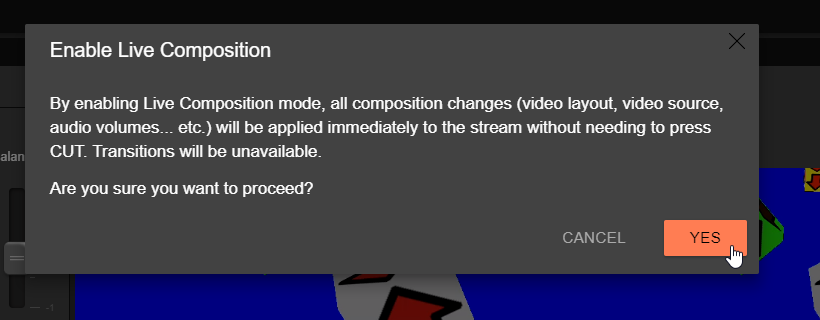
A warning dialogue appears which explains what Live Composition mode does.
Click YES to enable Live Composition.
Disable Live Composition
To disable Live Composition mode, click Disable in the Status panel.
OVP Broadcast Monitoring and Recovery
Studio can be used to create and manage MILE broadcasts that last multiple days or even weeks. To do so it has features allowing it to monitor the current stream health and to create a new stream in case something goes wrong. This restarter is available for all of Genvid supported Online Video Platform (OVP).
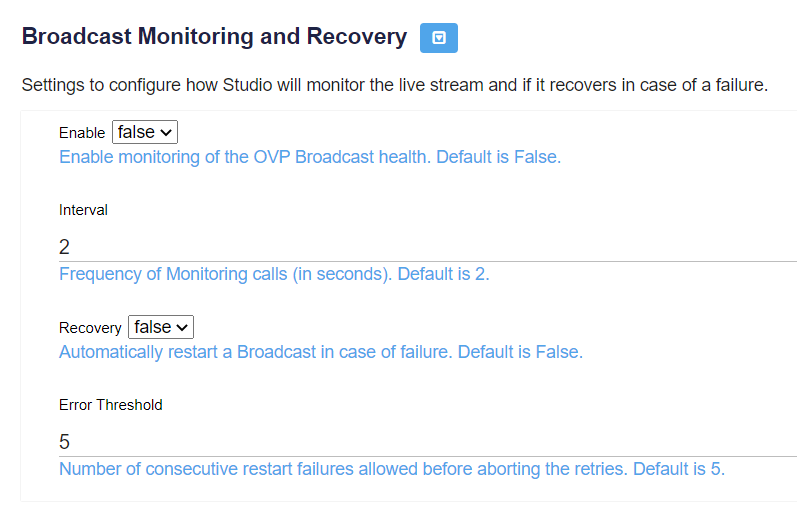
In the cluster Genvid Setting page, there’s a section called Broadcast Monitoring and Recovery that allows you to set up if and how you want the long broadcast to be managed. The setting allows you to choose to enable the monitoring of your stream, and at which frequency you want to do so.
Note
If you enable monitoring, you can choose to enable recovery, that will try to create a new stream if the current one is not healthy.
To avoid infinite loops of restart, there’s an Error Threshold setting to choose how many times Studio will try to automatically restart the stream on its own.
Important
Once Studio is set up to monitor and recover, it’ll make API calls to a SHIM (an application compatibility workaround) dedicated to the chosen OVP.

