Genvid Blueprint Class for Unreal Engine
Preparing your game
To simplify integrating the Genvid MILE SDK into your Unreal project, you can now create some Blueprint Classes directly from the editor.
These five classes will help you integrate the video, audio, streams, events, and commands:
GenvidAudioGenvidVideoGenvidStreamsGenvidEventsGenvidCommandsGenvidRequests
The GenvidSession class manages these five classes, while the
GenvidSessionManager class manages the GenvidSession.
The following diagram summarizes the relationships between these Blueprints. See Genvid Module Design for a more detailed version.
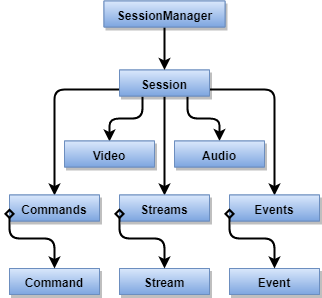
Fig. 9 Blueprint Diagram
Note
We designed the Genvid Module to potentially handle
multiple sessions in the future. For now, a GenvidSessionManager
instance may only contain a single GenvidSession based on the current
Genvid MILE SDK design.
You create your own Blueprint assets based on each one’s matching C++ class:
GenvidSessionManager
After you create all your Blueprint assets, set the session class you want to
use in GenvidSessionManager.
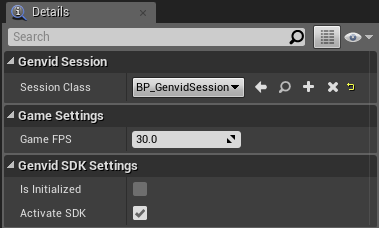
Fig. 10 GenvidSessionManager Blueprint Details
Caution
Make sure you have only one GenvidSessionManager instance. Select the
way that works best for your implementation. For example, you can declare it
in a class derived from UGameInstance.
GenvidSession
Next, select the GenvidSession Blueprint and set the child classes that you
want to use for the session.
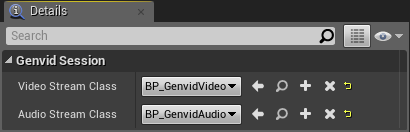
Fig. 11 GenvidSession Blueprint Details
GenvidVideo
After setting up the session, open the Genvid Video Blueprint. In the
Details panel, set the video Stream Name, the
Video Mode, and a Video Source (if required by your
selected video mode).
Note
The Automatic video mode captures the rendered window’s swapchain and sends it to the Genvid MILE SDK.
The Texture video mode lets you set any object derived from a UTexture
class.
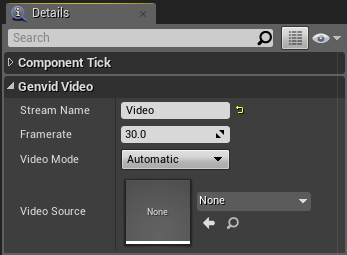
Fig. 12 Genvid Video Blueprint Details
GenvidAudio
Open the Genvid Audio Blueprint. In the Details
panel, set the audio Stream Name, the Audio Format, and
the Audio Mode.
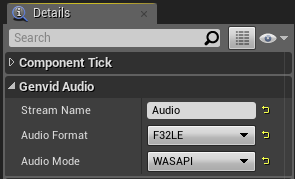
Fig. 13 GenvidAudio Blueprints Details
Note
- The
Audio Formatsetting selects the sound quality sent to the Genvid MILE SDK.
The Audio Mode setting selects which type of capture you want to use.
For now, only WASAPI is available, which captures all the audio
generated by the game machine.
GenvidStreams
Open the Genvid Streams Blueprint. You create the stream(s) you need in the
Event Graph panel.
Use the GenvidStream structure to create a stream. Type Make
GenvidStream in the All Possible Actions context menu to add it
to the Event Graph.
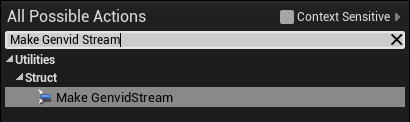
Fig. 14 Make GenvidStream
Select Name, Framerate, and the stream events you want.
Caution
You need to explicitly call the MatchHasStarted and MatchHasEnded
functions from UGenvidSessionManager to trigger Stream (Match
Started) and Stream (Match Ended).
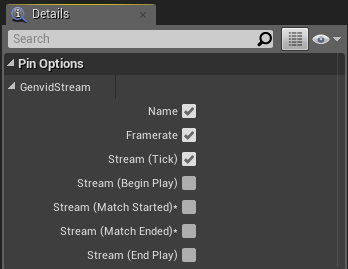
Fig. 15 GenvidStream Pin Options
For each stream event you select:
Add a custom event.
Add a node to the function you want to call from your custom event.
Add the stream to the
Streamsvariable.
Fig. 16 Create Stream example
Note
The Framerate property is only available for the event Stream
(Tick).
Set the Framerate property to 0 to call the event only one time.
Caution
If you select a stream event in the GenvidStream Pin Options but you don’t link a custom event to it, the Blueprint won’t compile. Uncheck the stream event to fix that.
GenvidEvents
Open the Genvid Events Blueprint. You can create any events you need in the
Event Graph panel.
Use the GenvidEvent structure to create an event.
Type Make GenvidEvent in the All Actions for this Blueprint contextual menu to add it to the Event Graph.
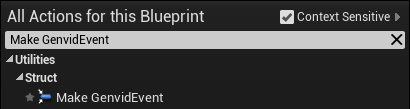
Fig. 17 Make GenvidEvent
- For each event you create:
Set the event Name.
Activate the Client/Server mode checking the box Replicated.
Link a custom event to the Delegate pin.
Add a node to the function you want to call from your custom event.
Add the event to the
Eventsvariable.
Fig. 18 Create Event example
Remember to implement your created events in your website. You can find examples on the event generation page. The web.js file in our Web Sample also illustrates this in more detail.
Note
The replicated option in GenvidEvents allow you to call the delegate directly from the server. It’s useful if you want to use Remote Procedure Calls.
GenvidCommands
Open the Genvid Commands Blueprint. You can create the command(s) you need in the Event Graph panel.
Use the GenvidCommand structure to create a command.
Type Make GenvidCommand in the All Actions for this Blueprint context menu to add it to the Event Graph.
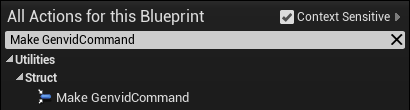
Fig. 19 Make GenvidCommand
For each command you create:
Set the command Name.
Activate the Client/Server mode checking the box Replicated.
Link a custom event to the Delegate pin.
Add a node to the function you want to call from your custom event.
Add the command to the
Commandsvariable.
Fig. 20 Create Command example
Remember to implement your created commands in your website. You can find examples on the sendCommands page. The web-admin.js file in our Web Sample also illustrates this in more detail.
Note
The replicated option in GenvidCommands allow you to call the delegate directly from the server. It’s useful if you want to use Remote Procedure Calls.
GenvidRequests
Open the Genvid Requests Blueprint. You can create the request(s) you need in the Event Graph panel.
Use the GenvidRequest structure to create a request.
Type Make GenvidRequest in the All Actions for this Blueprint context menu to add it to the Event Graph.
For each request you create:
Set the request Topic.
Link a custom request to the Delegate pin.
Add a node to the function you want to call from your custom request.
Add the request to the
Requestsvariable.Construct your reply and send it using the
SubmitRequestReplyfunction.
Remember to implement your created requests in your website. You can find examples on the sendRequestGetState page. The web-admin.js file in our Web Sample also illustrates this in more detail.
Starting Genvid Module
Instantiation
The first thing to do is instantiate the GenvidSessionManager.
One way to do this is:
Declare it in a
UGameInstance-based class.Call the
Initialize()function when the application starts.Call the
Terminate()function when the application stops.
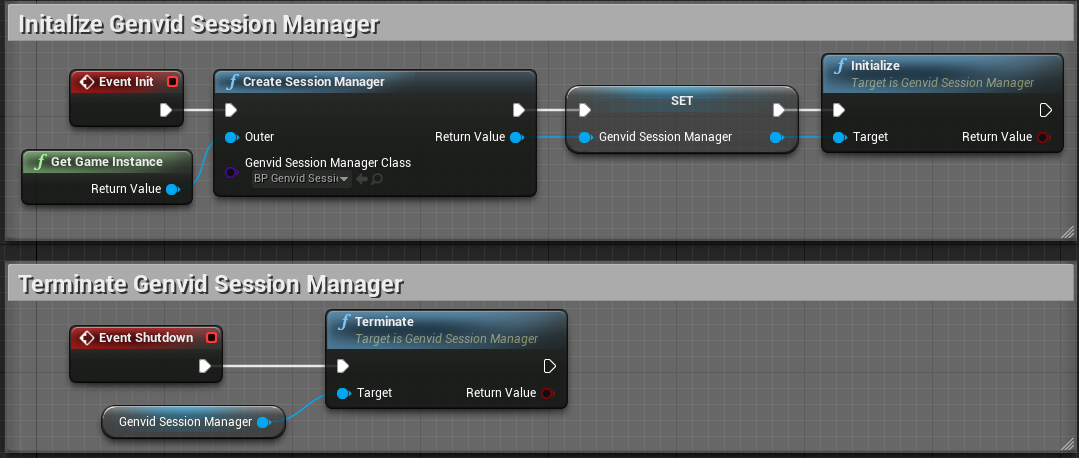
Fig. 21 Initialize and Terminate the GenvidSessionManager
Note
This implementation is one example of how to instantiate and terminate the
GenvidSessionManager. You can select the best way based on your
implementation.
Once you initialize GenvidSessionManager, add a new Blueprint class based
on APlayerController.
Click on Add Component and select the class you want to use in your Genvid Session:
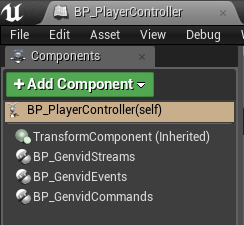
Fig. 22 PlayerController - Add Component
Note
Ensure you have set your PlayerController class in your GameMode
class Classes section.
Your Genvid Module is now ready.
See the Genvid Client/Server for Unreal Engine section for information on adapting your present code.
Class Diagram
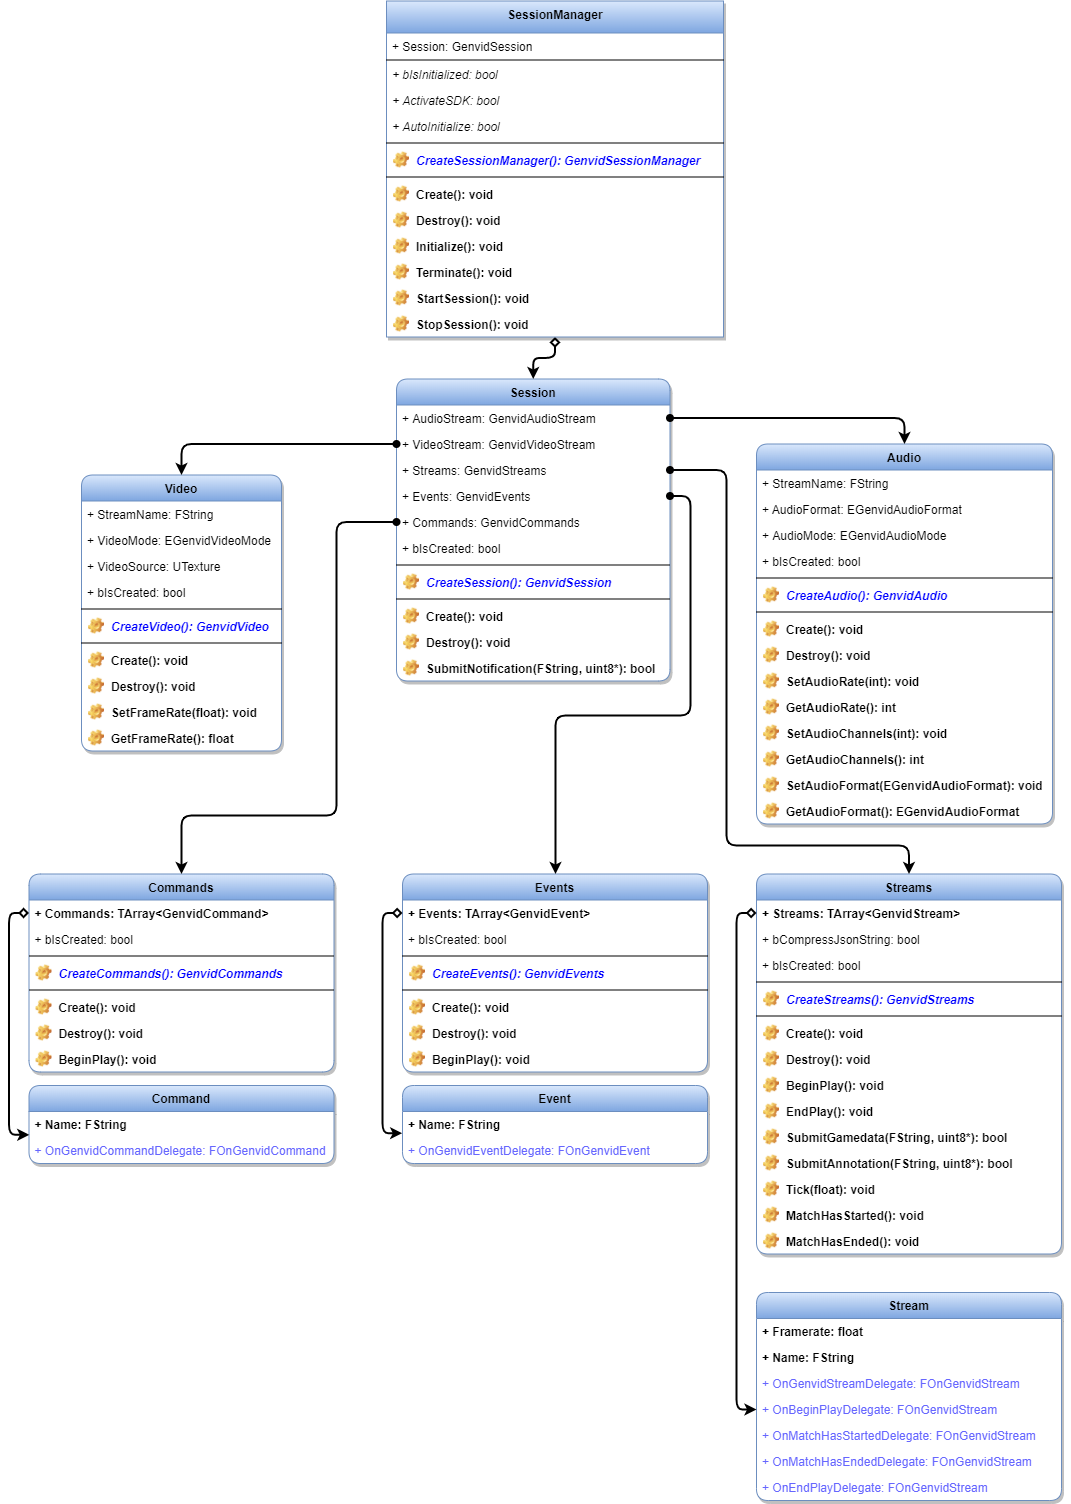
Fig. 23 Genvid Module Design